.png)
Connecting a custom domain to your Carrd website is one of those tasks that sounds more technical than it actually is once you understand what's happening between the two platforms involved. The process itself takes about ten minutes of active work. The rest is just waiting (if any).
Before anything else: you need a paid Carrd plan to use a custom domain. The Carrd Pro Lite plan is the entry level that unlocks this feature. If you're on the free plan and the domain option isn't appearing in your site settings, that's the reason.
Two platforms, one bridge
The most important thing to understand before you start is the difference between your domain registrar (where you bought your domain, such as Namecheap, Porkbun, or GoDaddy) and Carrd (where your site is hosted). These are two completely separate services that don't automatically know about each other. Your job is to build a bridge between them using DNS records, which are essentially routing instructions that tell the internet: "when someone types this domain into a browser, send them to Carrd."
You don't need to understand DNS in depth. You just need to know where to find the settings on each platform and what values to copy where.

Step 1: Enter your domain in Carrd
Start inside the Carrd editor. Open the site you want to connect, go to its settings via the gear icon, and find the "Custom Domain" tab. Type in your domain exactly as you want it to appear. Most people use the root version without "www" (yourdomain.com), and Carrd will handle redirecting the www version automatically once the connection is live.
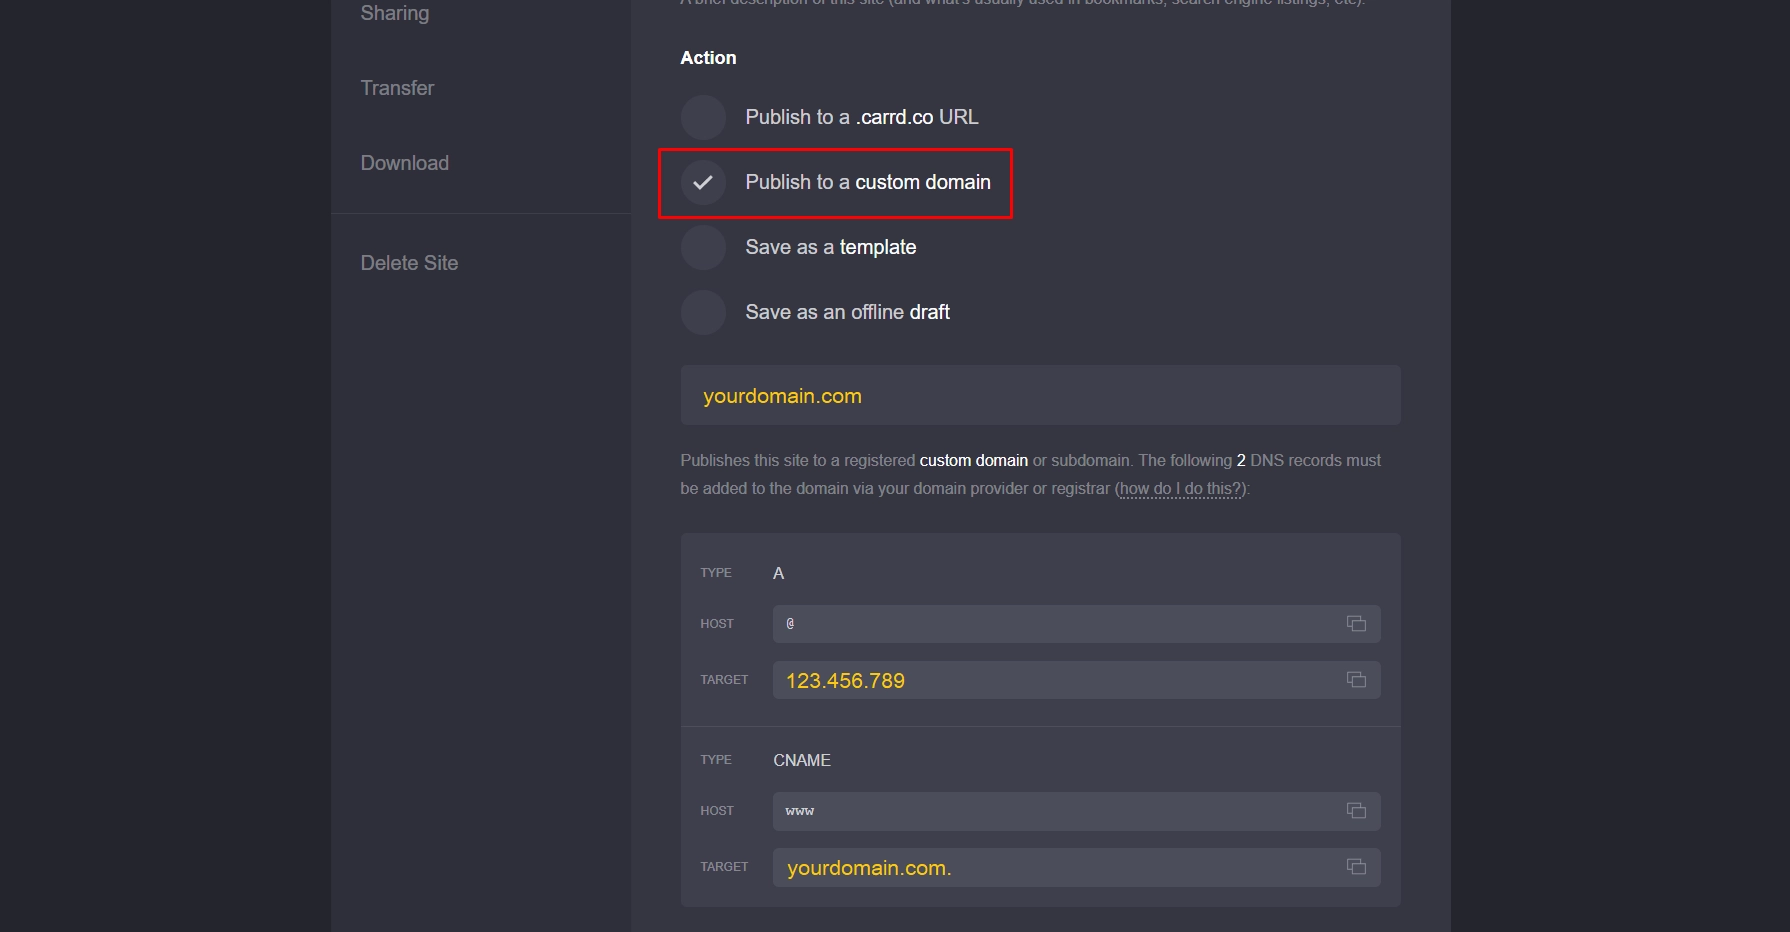
After you enter the domain, Carrd displays the DNS records (A and CNAME) you need to add on the registrar's side. Keep this screen open. You'll need those values in the next step.
Step 2: Add the DNS records at your registrar
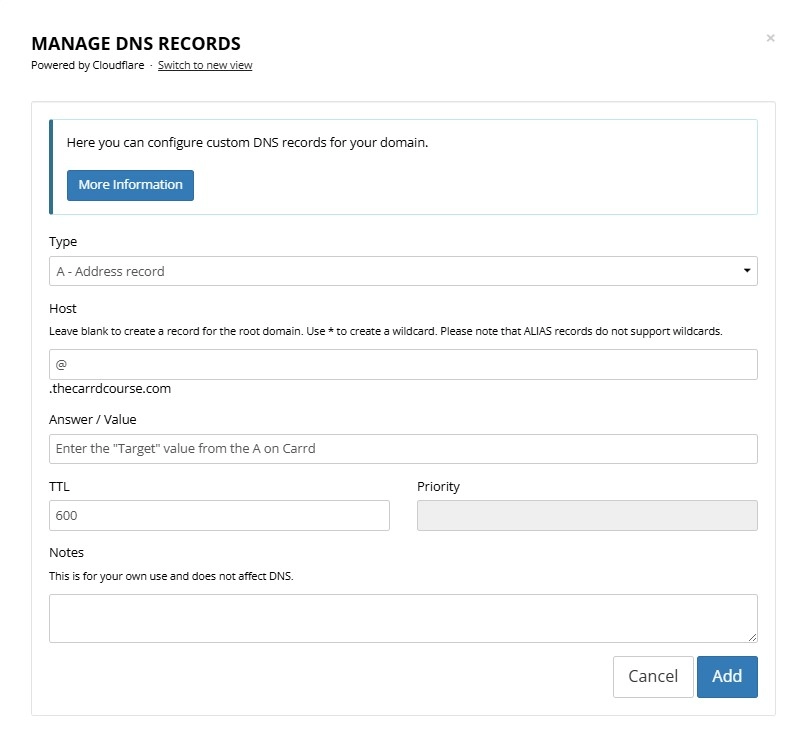
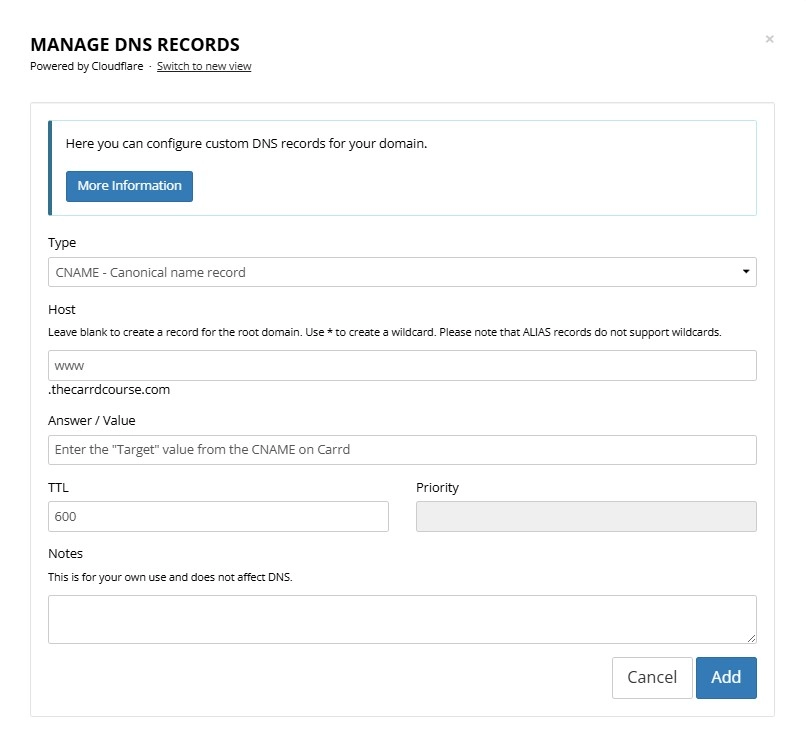
Log in to wherever you purchased your domain, find the DNS management panel (it might be labeled "DNS Settings," "Manage DNS," or "Advanced DNS" depending on the registrar), and add the records Carrd gives you. There are typically two: an A record that points your root domain to Carrd's server, and a CNAME record that handles the www subdomain by pointing it toward Carrd's infrastructure.
Two things that commonly trip people up here. First, many registrars pre-populate default A or CNAME records when you first buy a domain, and these will conflict with what you're adding. If you see existing records for the same hostname (@ for the root, or www), delete them before adding Carrd's values. Second, copy everything character-for-character, because a single wrong digit in an IP address or a missing letter in a CNAME target will break the connection, and tracking down a typo in DNS settings is more frustrating than it sounds.
Step 3: Verify the connection back in Carrd
Once you've added the records at your registrar, return to Carrd's custom domain settings and click verify. Carrd will look up the records you just added and confirm they're pointing correctly. If everything checks out, the domain connection is live and Carrd will automatically provision an SSL certificate, so your site loads over HTTPS without any additional setup on your part.
DNS propagation: why it might not work immediately
If Carrd can't verify the connection right away, don't assume you did something wrong. DNS propagation is the process of your new records spreading across servers around the world, and it can take anywhere from a few minutes to 48 hours, though most updates resolve within an hour. This is normal behavior. It's how the global DNS system works, not a Carrd-specific limitation.
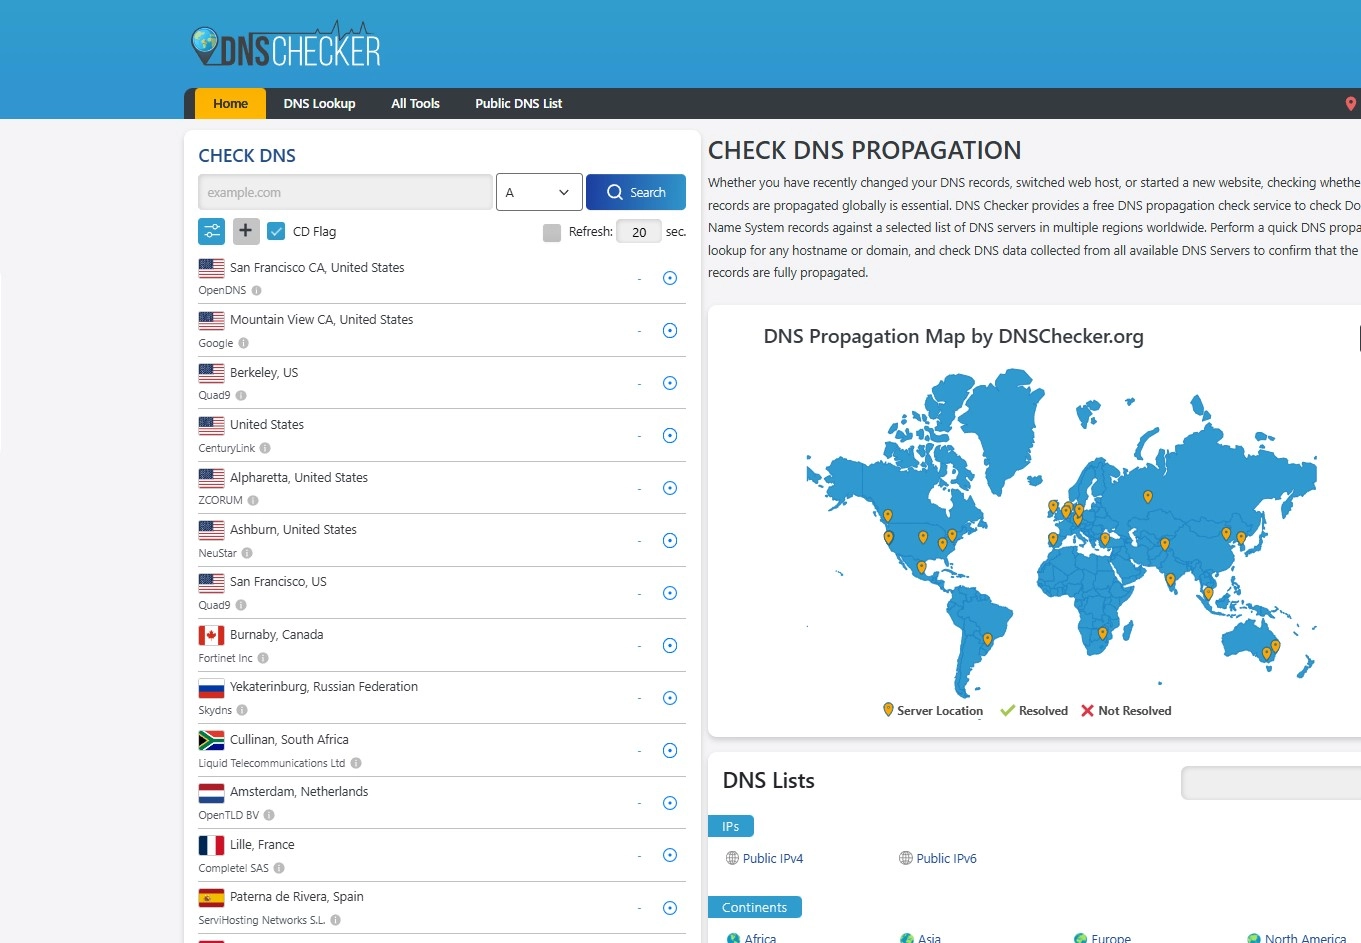
If you want to check progress, dnschecker.org is a useful tool. Enter your domain there and it shows you which servers around the world are already returning your new DNS values. This helps you distinguish between "still waiting on propagation" and "there's actually something wrong with the records."
Common issues and how to avoid them
If you recently moved a domain from another host to Carrd, allow extra time. When you change DNS records, cached versions of the old settings persist based on the TTL (Time to Live) value that was set on the original records, meaning your previous host's values can linger in some places even after you've made changes.
Some registrars don't support CNAME records at the root domain level (the @ hostname), which creates a conflict if that's what Carrd asks for. In those cases, Carrd provides an A record for the root as an alternative. Use that path instead.
One last thing worth knowing: once your custom domain is verified and connected, your original .carrd.co address automatically redirects to it. You don't need to update any links or settings manually. The redirect happens at the Carrd level, so anyone who bookmarked your old address still lands in the right place.
That's the full process
Domain registration at your registrar, DNS records added, verification inside Carrd, and a bit of patience for propagation to complete. Most people get through it without hitting any of the edge cases above, but when something does go sideways, it's almost always one of the three issues covered here.
If you've connected your domain and are now thinking about which Carrd template to build on, browse the collection at our Carrd templates library. There are options built for different business types and use cases, and seeing a finished example often makes the design decisions considerably easier. And if you ran into a specific issue during your setup that isn't covered here, feel free to contact us!